
The Evolution of a Résumé: How to Show Off Your Expertise Like Never Before
In 2012, I attended my third Esri International User Conference in San Diego, California. I loved every minute of it, but the highlight for me was watching a technical session on a new ArcGIS application called StoryMaps. As soon as I returned home, I pored over examples of StoryMaps that people all over the world had created, but one that really caught my eye was a résumé. I loved the concept and wanted to try it on my own.
Given the state of the world today with so many people out of work and looking for employment, our team wanted to share how Esri StoryMaps can be a great tool to highlight your résumé and stand apart from the crowd. I first did this 8 years ago with my own résumé, and it has been a helpful tool for introducing myself and my experience.
Here are some examples of my finished product:
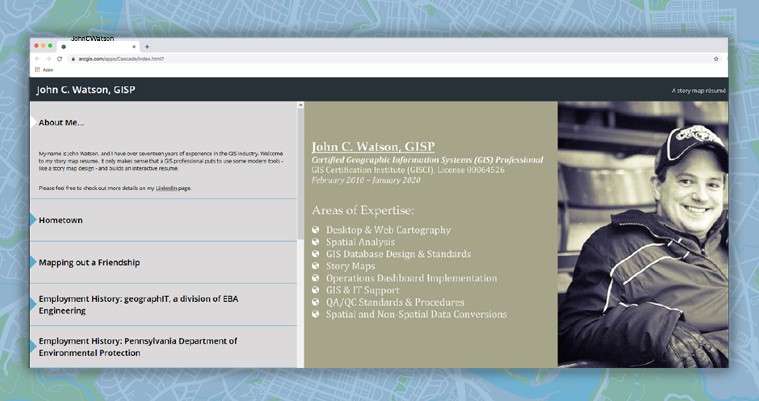
StoryMap journal format

StoryMap cascade format
A StoryMap résumé can make you stand out and show your prospective employer that you are comfortable with technology and visual tools. Although you do not need to be an expert at GIS technology to configure a StoryMap résumé, you will need to gather your information together and either access your ArcGIS Online account or create a free ArcGIS public account. This will get you started on creating the building blocks for your résumé.
Once logged in, you can build a new StoryMap by clicking “Create” under the “Content” tab and choosing “Build a StoryMap.” If you have never created a StoryMap before, here are a few tips for crafting a résumé from a map:
- Create a StoryMap résumé using different individual maps that are pinned to the location of your past employers. You can also add other web maps as you see fit; I have one that shows the location of my childhood home. You might also add a map of the location of your college(s).
- After adding a map marker at an employer’s location, click on the marker to view the default pop up, then click “Edit.” Here, you will paste highlights from your résumé in the Description box. You can also add an image and link to your employer if you choose.
- Save the map as “Employment History: the name of the company as it appears on your resume.” This will be the title of the different sections of your StoryMap résumé. (See my first example above.) Follow the same steps for each employment history section.
- Use one of the available StoryMap configurable templates, such as the cascade or journal, to build your résumé. Start building your résumé by adding a title and a professional image of yourself. Use the “Immersive” section to add text to your web map.
- Save often! Preview your StoryMap before changing the share settings to everyone (public). Once all of your web maps and the StoryMap are public, I suggest creating a TinyURL to share and link to your new digital résumé.
- Before giving public access, click on the Settings gear (above the sharing settings icons in the top left of the StoryMap builder) and select “Bookmarks.” Click on the sections you would like to include as easy access links, then click “Apply.”
You can find more information on creating and using StoryMaps here. Esri geography and GIS educator Joseph Kerski has also written about creating a StoryMap of your CV or résumé. He gives examples and tips on how to use the StoryMaps platform to make your résumé more presentable to prospective employers.
Remember, the same tips for writing an effective résumé still apply in the StoryMap format. Avoid text descriptions that are long and wordy; keep it easy to skim. Highlight key skills and keywords, and make sure they match the type of position you are targeting. And be sure to proofread your work!
While a StoryMap should not necessarily replace your standard résumé (at least for now), a StoryMap is a different and interactive way to tell a prospective employer about your experience using a mix of maps, text, and media. And if you are a GIS professional who would like to try your new StoryMap résumé out, EBA is hiring for GIS technicians and software developers!
geographIT is an Esri Silver Business Partner and always innovating with the use of Esri technology for non-traditional purposes. Consider exploring some of the other ways that geographIT has used StoryMaps.
John Watson, GISP, is a GIS analyst for geographIT, a division of EBA Engineering, Inc. He can be reached by email at john.watson@ebaengineering.com or on LinkedIn.